Showing posts with label makeover. Show all posts

Sunday, June 12, 2016

Sewing Room Refresh

My office / sewing studio has gotten out of hand.  I am one of those people who cannot work let alone be creative in a room that is cluttered and doesn't function.  Sometimes I feel like no matter how often I clean, the walls are still closing in on me.  I decided that it needed a refresh and a better way to store all my supplies.  Here's a lovely view of how my sewing room was before...

Why did I think an L-shape would work??  So much space is lost in that corner.

While my desk has been working out pretty well, I feel like it's taking up too much space on this wall with all the natural light.

Ok, so this is mid clean-out for this redo, but honestly, it normally doesn't look much better...


Off to Pinterest I went to find some sewing room storage inspiration.  There are so many cleaver ideas out there, but the one that stuck with me was after seeing this image:

Photo from Sew Caroline
Pegboard, the perfect solution!  Now all those things that are cluttering up my precious table top space will be gone!  And I can paint it in a cute shade of turquoise!  Ha, maybe not because I am impatient and want this project finished during my child's nap, so we have 2 hours!

The pegboard was an easy purchase from the hardware store and cuts pretty well with a circular saw (just don't cut thru the little holes unless you enjoy having debris thrown at your face.  Learned that one the hard way.)

We slapped it up on the wall and I just started to hang EVERYTHING I COULD.  I also did some serious decluttering and threw away at least 1 contractor sized trash bag full of half done projects and other random things.  Why did I keep so many empty plastic bags??   I moved my work tables over to the wall that originally had my desk and bookcases.  I ended up losing the smaller bookcase - I just didn't need it or all the things it was holding.


LOVE pegboards, I just may put them all over the house!

Sorry printer, you live on the floor now.

These pieces had to stay in their place, oh and don't mind my intern.

All in all, an easy project, more or less done in 1 afternoon, and under $25 for the pegboard and a hanging kit with all the little hooks and doo dads.


SaveSave

Friday, March 11, 2016

Kitchen Remodel - Part 3


Our kitchen is finished!  Not that the actual construction wasn’t pretty, but I didn’t take a whole lot of photos, so I decided to wait until the end to post about that part of it.  Here is our kitchen after demo with all the cabinets constructed and ready to be mounted.

Not going to lie, I was freaking out at this point because the cabinets are HUGE!  Having done all the design work myself, I was seriously doubting the design and convinced that my kitchen was going to feel even smaller than it was before, but our contractor assured me it wouldn’t, but I kinda still didn’t believe him.


Giant boxes....definitely terrified.

Also, not sure if you can tell, look above the window...see that weird looking wood?  Yup, termites.

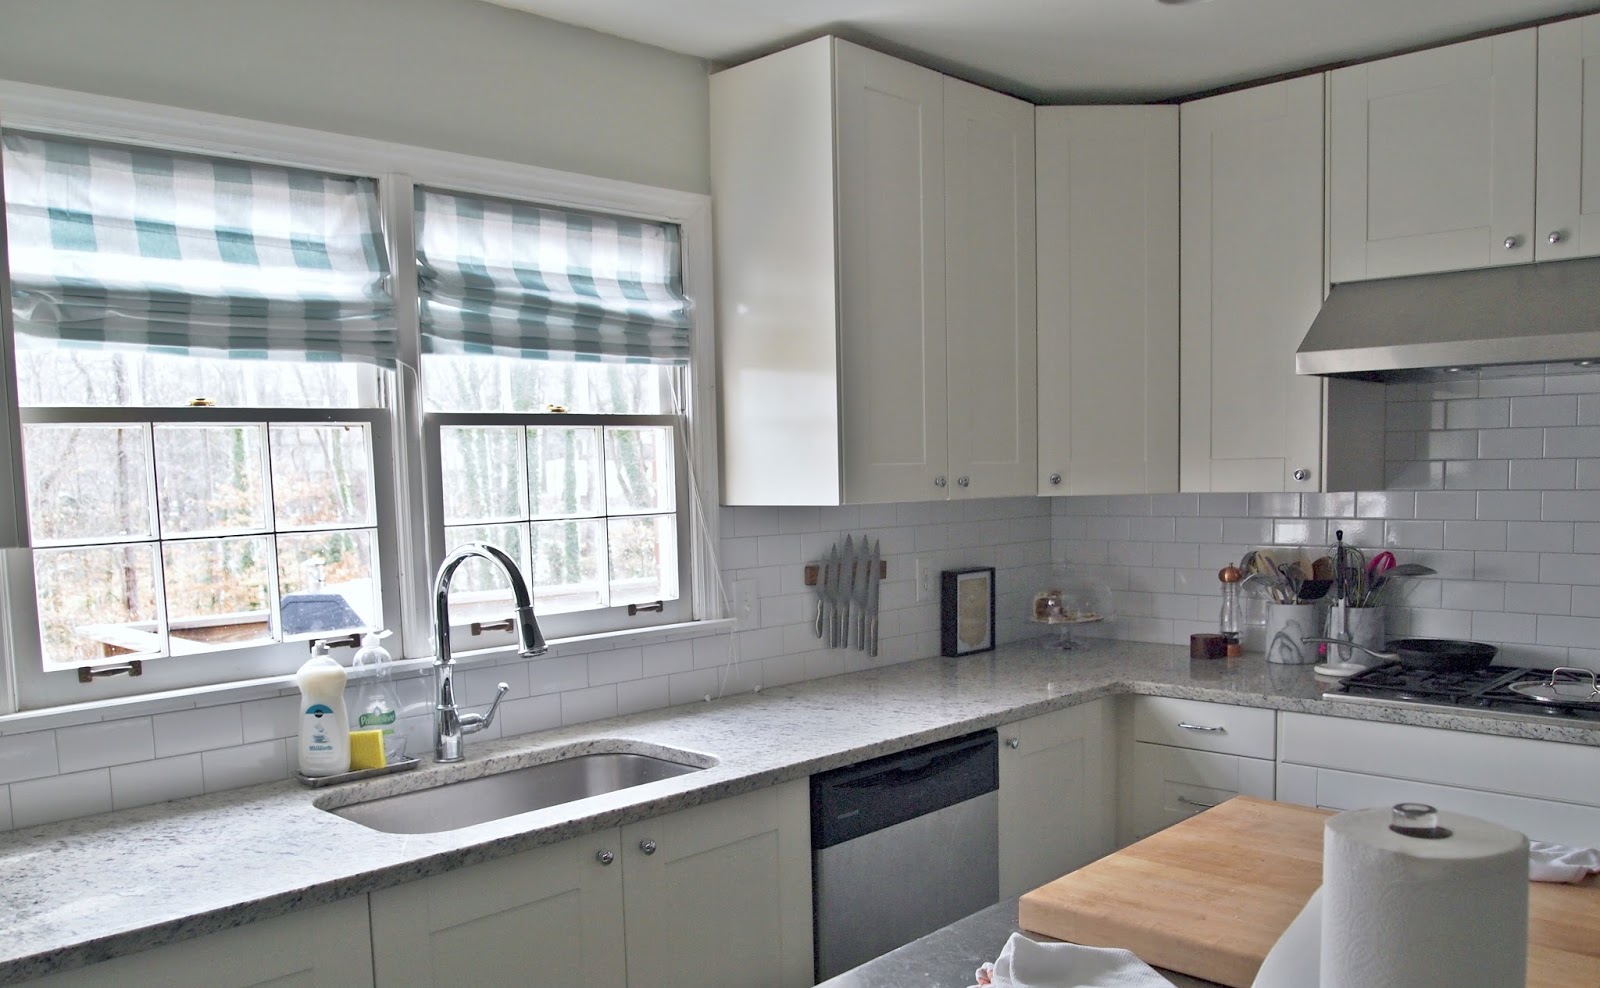
We were delayed about a week waiting on the countertops – the cabinets had to be set before the granite guy could come out and measure for the tops, and then it took them about 5 days to fabricate.  We went with a granite called “Dallas White”, which definitely looked much different in the showroom than it now does in my kitchen, but it’s close enough and I’m not going to freak out again when we got a great deal and a relatively quick turnaround.


Anyways, here is our finished kitchen!  The whole process took about 4 weeks from cabinet delivery to moving in plates and glasses.  Not too bad.  I’ve mentioned or linked all supplies at the bottom of this post.


Like those shades?  I made 'em myself :)
My new baking center!

My grandmother's recipe for Tuna Congealed Salad, one of the most retro things in her file I could find. 

Some fun kitchen art.


Cabinets - Ikea 
Granite - Dallas White 
Cabinet Hardware - Build.com knobs and pulls both in chrome.
Knife Block - M.O.C. Woodworks, ours is in walnut.
Fabric for shades - Fabric.com


Wednesday, July 9, 2014

Construction Junction


What’s your function?  Just kidding, but I can’t help humming that song from everyone’s favorite, Schoolhouse Rock (and I know those aren't the real words).  Our den has been demolished, kind of.  All the furniture is now in the center of the room and the entire house smells of really intense paint fumes.  Our den originally looked like this:

Awesome right?  Old carpet and dark wood paneled walls.  So the carpet came out the day we closed on the house so the last 5 months or so it has looked like this:
 Ah much better.  Moo moo Mr. Cow.  Currently we have 2 cow hides in this crazy long room, one came from Scott’s Antique Market here in Atlanta for a very reasonable $250 and the other apparently lived with my brother at Auburn and has seen some rough nights.  I believe he told me one of his friends slept completely wrapped up in it, let’s just hope this friend had clothes on…

So now our den is a crazy mess, but I am hopeful.  All the trim has been ripped off and what hasn’t come off has been primed to be painted white.  Yippee!  The trim was actually really nice, super big and thick and original.  The paneling on the other hand is incredibly cheap and flimsy and was not worth saving painting. 
 
Photo from Houzz
This is roughly the color scheme I am going for.  Dark navy walls with bright white trim and fireplace.  This room is much more formal than ours, but the colors seem spot on.

On to the accessories!  I promised my husband an oversized ottoman, so I like the style of this one and I think it can be made using a coffee table.  Don’t worry, tutorial will come with that. 
 
Originally an older post from Joss&Main, shoe painting similar here.

And here is my other upholstery project.  
Original image from Style Me Pretty
I already have the wing chair, it is currently taking up way to much space in my office.  It came from my grandmother’s house, so I love that I will be keeping it in the fam.  The fabric is from one of my favorite sites, Spoonflower, and you can find this exact pattern and it’s wonderful designer here.  I look forward to adding this to our den with its height and fun pattern.

Light fixtures from Shades of Light
Lights.  These are actually already hanging, and I love them.  I love them so much that I will most definitely be taking them with me us when if we move.  They’re great and big and at night create the most beautiful light effect on the ceiling.  Kinda romantic, if you’re into that sort of thing.

And here is the room today.  

Don't judge all the piles of stuff.  But do admire the lights in action!  Oooh aaah.

Til next time (when hopefully all this will be finished!).

Wednesday, June 18, 2014

Guest Bedroom Part 2 - Upholstered Headboard


I made a headboard! 

This was a pretty painless project.  The only pain I felt was more of a freaking out sensation as I stapled the first side of the fabric hoping for the best.  I scowered the internet for a quick and easy tutorial but ended up taking advice from a few and winging the rest.  They were all so different and no one had really precise measurements for the headboard or one particular way to hang it on the wall.  Some anchored it using hardware, others built legs…it really all depends on how you will be making up the bed when it’s all finished.  My guest room is not ginormous, so saving space is key – meaning lets mount this thing to the wall!

Ok so I started with one ginormous piece of plywood and cut it down to 4x5 feet.  My queen mattress measures about 60 inches across, and after studying pictures on pinterest I decided I didn’t want much headboard peeking out around the sides.  Also, since I am mounting this to the wall and it’s not standing on it’s own two feet, I decided to go with one of the least expensive types of plywood available.  In the plywood section they had about 15 different kinds, ranging from $12 to $80 a piece. 


 Next step – attach some hanging stuff.  We used 2x4’s for this part because that’s what we had lying around, but you could use something thicker if you wanted.  After cutting to size, we screwed them to the ends of the plywood and then one piece running perpendicular to them in the center (which you don't see because I forgot to photograph...too excited to start stapling!). 


My brother cut the center piece on an angle all the way across so that it’s matching piece or better half could be attached to the wall and they would sit together so nicely like two people holding hands – but instead just two lifeless pieces of wood holding a wonderful headboard.  Make sure to do all the attaching before upholstering.

Upholstery – much easier this time around because squares are great.  I don’t care how that saying goes about “don’t be a square!” or “what a dork, she’s such a square”, you are wonderful squares, as are your cousins the rectangles.


 Base layer is batting.  I bought this in the craft store and the twin size was more than enough for my headboard, and I ended up folding it in half so my headboard is extra fluffy.  Just simply stapled, nothing too fancy, but be aware of how far in your staples are for the second layer. 

Next is the fabric.  Mine is a wide navy and white cabana stripe upholstery weight cotton.  Next time I think I will probably use some white muslin or something underneath just to give it a little more umph.  Freaked out slightly about keeping the stripes on straight but I think it worked out okay.  To keep things flat I always work one side (doesn’t really matter which) and then to the opposite of that one, pulling it tight to keep things from shifting diagonally.


Once it was done we hung it up!  The center wood piece thingie does a great job of distributing the weight and it is not moving at all. 

I haven’t completely finished the room, but here is a sneak peak of how it’s coming so far J

Oh and I needed new monogrammed shams...

Remember this chair??  Still needs a cushion.