Tuesday, July 22, 2014

New Dog Bed Inspiration


Since Pearl the pup has decided that current bed is no longer acceptable, I have decided to make her one.  This may or may not completely blow up in my face, and I will scream and yell if she destroys it, but she is my fur baby and I love her and want to make her something.

Poor thing...all alone and mushed into a corner.
 Her bed must have offended her, judging how she drags it around and simply leaves it in strange places.  I’m almost positive her attitude towards it would sound like this:  “Ugh, you nasty bed.  How dare you make me drag you around, rip out your insides and leave you in places where I would never sleep.  And you have the NERVE to show back up in my spot??  That’s it! Grrrr!”  And then I look up from my desk, find the pitiful, lumpy bed askew in the corner of my office with piles of olive green stuffing everywhere.  How is there so much stuffing in one bed?  I’ve been picking it up for weeks now.

Anyways, the new bed will be constructed with love and much more durable fabric.  But alas, what design to go with?  There are so many cute DIY’s and tutorials out there, but I think the one I like the most (because I love piping!) will be from Design Sponge.
Box Cushion Tutorial from Design Sponge
 See – adorable right??  And that sweet puppy would never eat that pretty bed, no way.

Love this one.  I love stripes (obvi) and labs, and it gives me a little glimmer of hope of the tranquility that may exist in my house once her perfect little cushion is made.   Thanks Elle Décor for the false sense of serenity.  Maybe in 5 years…

Love the size and squishiness of this one.  I may try to do this while still using a box cover pattern.  This exact bed can be purchased at BaxterBoo.

I love pugs.  But I can tell you I have never known a pug that would sleep on its own bed all alone.  This bed is similar in shape to the one above and is available through the Pampered Puppy.

Alright, got some ideas, and fabric has been ordered – I went with Premier Prints Flynn in navy blue.  I love navy, and I have a yellow dog, so that wasn’t the smartest decision I’ve made today, but hey, I’m only human.  I’m thinking some bright contrasting piping will definitely be necessary, unless that will attract the little puppy teeth even more…

Any spoiled pampered pooches in your home?  

Monday, July 14, 2014

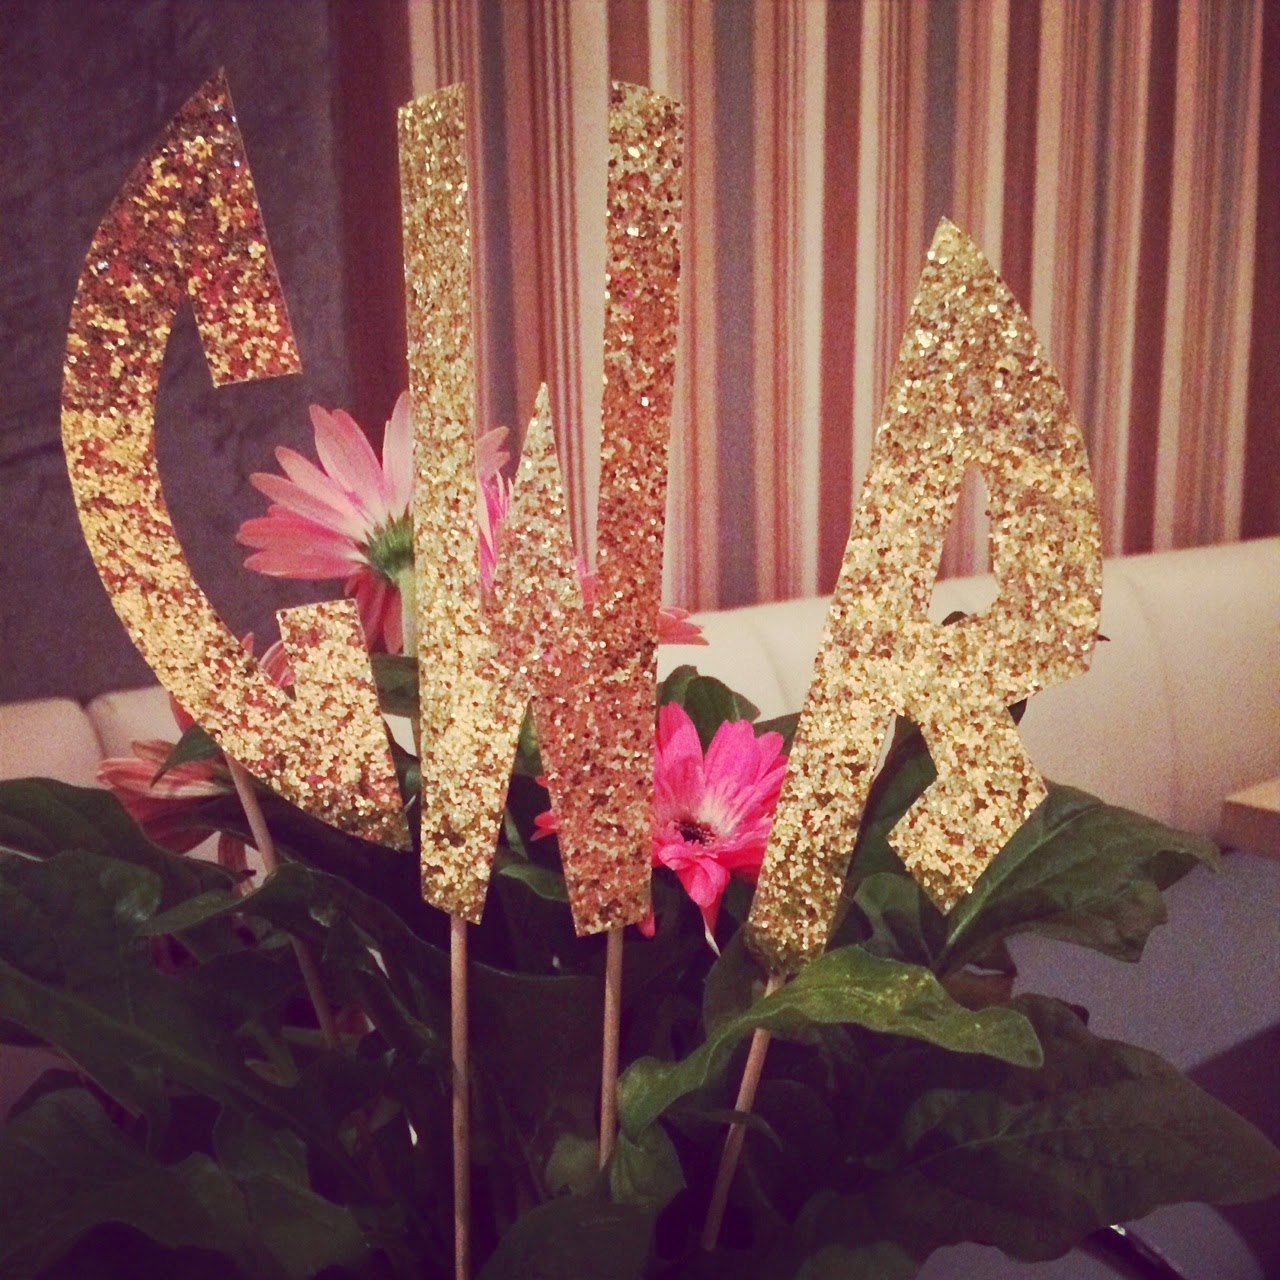
Glitter Monogram DIY


For my besties birthday last week I decided to take charge with the table décor.  We dined at a lovely favorite restaurant of mine, JCT Kitchen.  They are known for their fried chicken, deviled eggs (the yolks are whipped with olive oil and salt – that’s it!) and delicious vodka gimlets, but hey, I'm easy to please.

I love bringing a small arrangement or pot of flowers as decor since they’re a great leftover for the birthday girl along with decoration – but what make’s them even better??  When you stick a bright glitter monogram on top of them!  Here’s the quick and easy way to do it.


Items you will need:
Glitter paper – I found mine in the scrapbook section of Hobby Lobby, they also make glitter foam paper…
Hot Glue Gun
Wooden Skewers – mine came from the grocery
Craft Knife
A monogram design – the simpler the better
Scissors


First thing is to design your monogram on your computer or hand draw it.  I used the circle monogram font from Harold’s Fonts.   I think I paid $19 for it, which might seem like a lot for a computer font, but it has 4 variations plus a bunch of frames.   Also I’ve spent much more on much stupider things…ahem…as seen on TV products…


Print out your monogram and tape it to a surface (if you’re using a knife) or prepare to cut it out. 


Carefully cut…I mean it’s not the end of the world if it isn’t perfect, but keep in mind once you start cutting the glitter paper, you lose a little of the quality with the texture of the paper.


Ok, all done.  So take your glitter paper, flip it over, and trace your monogram on the back.  Be sure to trace the monogram backwards so that the glitter side is the correct order for the initials.


Next cut your letters!  Little pieces of glitter will probably fly off in all directions, but not to worry, because who doesn’t want more glitter in their house?  I know I do.


Next lay your letters out and decide the best place for your wooden skewers for each letter.  I ended up using 2 on the W so that it wouldn’t flop over once standing up in the flowers.  They don’t need a ton of support but the letters like W, M, probably H, will need 2 skewers.


Hot glue them on and there you have it! 


I scattered the table with large gold sequins and made the birthday girl a glitter stem covered champagne glass, since she loves bubbles.


All the ladies after dinner.  Happy Birthday Caroline!

Wednesday, July 9, 2014

Construction Junction


What’s your function?  Just kidding, but I can’t help humming that song from everyone’s favorite, Schoolhouse Rock (and I know those aren't the real words).  Our den has been demolished, kind of.  All the furniture is now in the center of the room and the entire house smells of really intense paint fumes.  Our den originally looked like this:

Awesome right?  Old carpet and dark wood paneled walls.  So the carpet came out the day we closed on the house so the last 5 months or so it has looked like this:
 Ah much better.  Moo moo Mr. Cow.  Currently we have 2 cow hides in this crazy long room, one came from Scott’s Antique Market here in Atlanta for a very reasonable $250 and the other apparently lived with my brother at Auburn and has seen some rough nights.  I believe he told me one of his friends slept completely wrapped up in it, let’s just hope this friend had clothes on…

So now our den is a crazy mess, but I am hopeful.  All the trim has been ripped off and what hasn’t come off has been primed to be painted white.  Yippee!  The trim was actually really nice, super big and thick and original.  The paneling on the other hand is incredibly cheap and flimsy and was not worth saving painting. 
 
Photo from Houzz
This is roughly the color scheme I am going for.  Dark navy walls with bright white trim and fireplace.  This room is much more formal than ours, but the colors seem spot on.

On to the accessories!  I promised my husband an oversized ottoman, so I like the style of this one and I think it can be made using a coffee table.  Don’t worry, tutorial will come with that. 
 
Originally an older post from Joss&Main, shoe painting similar here.

And here is my other upholstery project.  
Original image from Style Me Pretty
I already have the wing chair, it is currently taking up way to much space in my office.  It came from my grandmother’s house, so I love that I will be keeping it in the fam.  The fabric is from one of my favorite sites, Spoonflower, and you can find this exact pattern and it’s wonderful designer here.  I look forward to adding this to our den with its height and fun pattern.

Light fixtures from Shades of Light
Lights.  These are actually already hanging, and I love them.  I love them so much that I will most definitely be taking them with me us when if we move.  They’re great and big and at night create the most beautiful light effect on the ceiling.  Kinda romantic, if you’re into that sort of thing.

And here is the room today.  

Don't judge all the piles of stuff.  But do admire the lights in action!  Oooh aaah.

Til next time (when hopefully all this will be finished!).